Introduction
The evergreen Phong reflection model (also known as Phong Shader or Phong Illumination) is probably the most used shader ever. Yielding very good results and being pretty comprehensible makes it an excellent go to shader for someone just getting into the shader land.
The Phong Reflection Model
Before we dive in let’s look at the Phong reflection model equation which is below. All the vectors we’ll be using have to be normalized.

Now let’s break it down. Every surface point Ip is a sum of three different illumination components. The first one is ambient lighting. It basically provides a base illumination so that no part of an object that is being illuminated appears completely unlit. We calculate the other two for every light we have in the scene. For the sake of explanation we’ll assume that we have only one light and then build up to multiple lights from there. If we have only one light we can simplify the upper equation to:

Now let’s look at the other two components. The second component is called diffuse light which is the light that bounces from the object in all directions. The third one is the specular component which can be seen as shiny bright spots. One more thing to mention is when we’re working with RGB we basically apply the equation for each color component.
Now we just need to explain what all those vectors are. Wikipedia provides a nice image that does most of the explanation for us:

Looking at it we have:
- N, the normal vector.
- L, the light vector which is pointing towards the light source.
- R, the vector of a perfectly reflected ray of light.
- V, the view vector which is pointing towards the camera.
- H, which is used for optimizing Phong shading using an approximation called Blinn-Phong shading. We don’t need it here.
How all three components add up is perfectly visible from another Wikipedia image:

Ambient Component
Like mentioned above the ambient component provides base illumination for an object in case we’re getting zero direct light. If we look at a real world scenario where we have a light in a room we’ll never see an object completely black. That’s mostly due to light reflection from other objects in the room etc. Phong reflection model simplifies this by not calculating exactly how much light we get indirectly (by bouncing from other objects). Instead we always apply a minimum amount of light.
In order to calculate ambient lighting we need two things: the ambient coefficient which is just a constant value of how much ambient light would we like to apply and the ambient light color. Transforming that into an equation we have:
Ia = kaia
This shouldn’t be too difficult to understand. The bigger the ka the more ambient light we get.
Diffuse Component
The diffuse component is the most “aha” component once you get it how it works. Let’s first look at the formula:
Id = kdid(N • L)
The first part is fairly similar to how ambient light is calculated but then we have (N • L). Now what does that mean? Well it’s a really nice trick. Lets look at a real world scenario. If we’re holding a torch and point it directly at an object we’ll see the object very well lit. That’s because most of the light is reflecting back at us. If we move the torch so that it’s pointing perpendicular to the surface of the object we won’t be able to see any light reflect off it (or just a teeny tiny bit). If we’re in a room we’ll still be able to see the object because of other light reflections (ambient light). But what does that have to do with (N • L)? Well, a really cool thing arises in euclidean geometry which states:
 where Θ equals the angle between a and b
In our case a and b are normalized (their length is 1) so the dot product is basically just the cosine of the angle between the two vectors (since a = 1 and b = 1 so 1 times 1 is 1). And when the vectors are collinear (Θ equals 0) the cosine value is 1 and when they are perpendicular (Θ equals π / 2) their cosine is 0. That finally tells us that when the light source L is shining directly on the surface (collinear with N) we get the most reflected light and when it’s perpendicular to it we get zero reflected light. And when it’s somewhere in between we get a proportionate amount of light reflected back. Which makes sense considering the real world scenario above.
Specular component
One last thing we need are the fancy shiny highlights. If we’re looking at a shiny object such as plastic and we look at it at a right angle we’ll see some very bright spots which are called specular highlights. You can see them on the image above. The specular component formula is as follow:

Again we start with a specular constant and the specular light which are then multiplied by (R • V)a. The first part we already understand from abient light. But how does (R • V)a work? V is the easy part. It’s the vector pointing from the surface point towards the camera. R is the reflection vector which is calculated as:

Why this makes sense and how it works can be read here. From the diffuse section we’ve learnt that more similar the vectors are the more light we’ll receive back. But for the specular highlights we have to consider R and V. That’s because if we’re looking from the same spot as the perfectly reflected ray bounces to we’ll see the most specular highlights. Then we raise this product to the power of α which we’ll call shininess. The shinier the object the bigger specular highlights will be.
Putting it together
Now we have a basic understanding of all three components. As already mentioned we would have to compute Id and Is for each light in the scene if we have more lights. But this also depends if we’re using deferred rendering or forward rendering. I won’t get much into it as it’s another topic. Most of the time we’ll be using forward rendering. You can read more about the difference between them here. Forward rendering is also Unity default.
Let’s make this work in Unity now.
Implementation in Unity
If you’re completely new to Unity I’d recommend that you check out the shader basics. How to pass variables in, how the SubShaders work etc. accessible here. I will provide comments about what a particular part of the code does but most should be self explanatory given what we’ve just learnt. I also use textures in the shader below which aren’t necessary and you can just comment them out. A texture is just a color read from an image.
What we need in order to implement our shader is:
- The color of our object (we can also use a texture)
- The shininess of our object (α from above)
- The specular highlights color
Unity already provides us with:
- The position of the lights
- The position of the camera
- The ambient light coefficient and the ambient light color
That being said let’s dive straight into the code. The first pass calculates all three components of illumination. All other passes only need to calculate the diffuse and specular components. We then blend them additively. What that means can be read here.
If you’d like me to explain the Unity part in more detail do let me know.
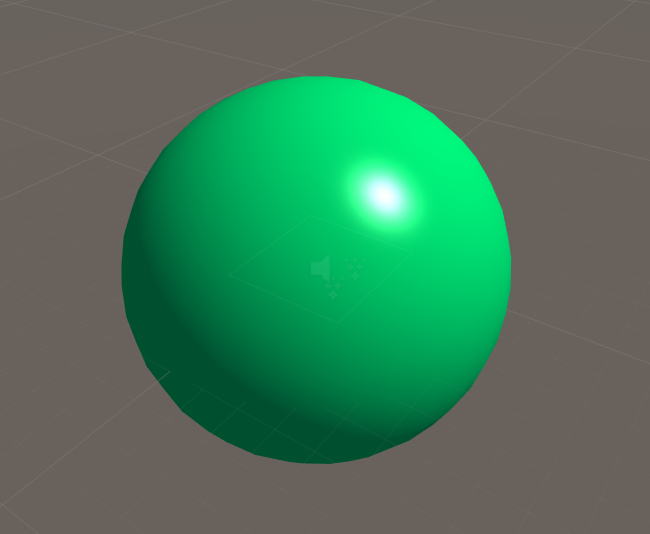
Below is an example of how the end result will look like. I set a green color and didn’t add any texture.
The code
By now you should know enough that the code below will be pretty easy to understand.
ps. I recommend that you copy and paste this somewhere as it’s quite hard to read in here.
Shader "PhongShader" {
    Properties {
        _Color ("Color", Color) = (1, 1, 1, 1) //The color of our object
        _Tex ("Pattern", 2D) = "white" {} //Optional texture

        _Shininess ("Shininess", Float) = 10 //Shininess
        _SpecColor ("Specular Color", Color) = (1, 1, 1, 1) //Specular highlights color
    }
    SubShader {
        Tags { "RenderType" = "Opaque" } //We're not rendering any transparent objects
        LOD 200 //Level of detail

        Pass {
            Tags { "LightMode" = "ForwardBase" } //For the first light

            CGPROGRAM
                #pragma vertex vert
                #pragma fragment frag

                #include "UnityCG.cginc" //Provides us with light data, camera information, etc

                uniform float4 _LightColor0; //From UnityCG

                sampler2D _Tex; //Used for texture
                float4 _Tex_ST; //For tiling

                uniform float4 _Color; //Use the above variables in here
                uniform float4 _SpecColor;
                uniform float _Shininess;

                struct appdata
                {
                    float4 vertex : POSITION;
                    float3 normal : NORMAL;
                    float2 uv : TEXCOORD0;
                };

                struct v2f
                {
                    float4 pos : POSITION;
                    float3 normal : NORMAL;
                    float2 uv : TEXCOORD0;
                    float4 posWorld : TEXCOORD1;
                };

                v2f vert(appdata v)
                {
                    v2f o;

                    o.posWorld = mul(unity_ObjectToWorld, v.vertex); //Calculate the world position for our point
                    o.normal = normalize(mul(float4(v.normal, 0.0), unity_WorldToObject).xyz); //Calculate the normal
                    o.pos = mul(UNITY_MATRIX_MVP, v.vertex); //And the position
                    o.uv = TRANSFORM_TEX(v.uv, _Tex);

                    return o;
                }

                fixed4 frag(v2f i) : COLOR
                {
                    float3 normalDirection = normalize(i.normal);
                    float3 viewDirection = normalize(_WorldSpaceCameraPos - i.posWorld.xyz);

                    float3 vert2LightSource = _WorldSpaceLightPos0.xyz - i.posWorld.xyz;
                    float oneOverDistance = 1.0 / length(vert2LightSource);
                    float attenuation = lerp(1.0, oneOverDistance, _WorldSpaceLightPos0.w); //Optimization for spot lights. This isn't needed if you're just getting started.
                    float3 lightDirection = _WorldSpaceLightPos0.xyz - i.posWorld.xyz * _WorldSpaceLightPos0.w;

                    float3 ambientLighting = UNITY_LIGHTMODEL_AMBIENT.rgb * _Color.rgb; //Ambient component
                    float3 diffuseReflection = attenuation * _LightColor0.rgb * _Color.rgb * max(0.0, dot(normalDirection, lightDirection)); //Diffuse component
                    float3 specularReflection;
                    if (dot(i.normal, lightDirection) < 0.0) //Light on the wrong side - no specular
                    {
                        specularReflection = float3(0.0, 0.0, 0.0);
                	  }
                    else
                    {
                        //Specular component
                        specularReflection = attenuation * _LightColor0.rgb * _SpecColor.rgb * pow(max(0.0, dot(reflect(-lightDirection, normalDirection), viewDirection)), _Shininess);
                    }

                    float3 color = (ambientLighting + diffuseReflection) * tex2D(_Tex, i.uv) + specularReflection; //Texture is not applient on specularReflection
                    return float4(color, 1.0);
                }
            ENDCG
        }
        Pass {
          Tags { "LightMode" = "ForwardAdd" } //For every additional light
        	Blend One One //Additive blending

        	CGPROGRAM
          #pragma vertex vert
          #pragma fragment frag

          #include "UnityCG.cginc" //Provides us with light data, camera information, etc

          uniform float4 _LightColor0; //From UnityCG

          sampler2D _Tex; //Used for texture
          float4 _Tex_ST; //For tiling

          uniform float4 _Color; //Use the above variables in here
          uniform float4 _SpecColor;
          uniform float _Shininess;

          struct appdata
          {
              float4 vertex : POSITION;
              float3 normal : NORMAL;
              float2 uv : TEXCOORD0;
          };

          struct v2f
          {
              float4 pos : POSITION;
              float3 normal : NORMAL;
              float2 uv : TEXCOORD0;
              float4 posWorld : TEXCOORD1;
          };

          v2f vert(appdata v)
          {
              v2f o;

              o.posWorld = mul(unity_ObjectToWorld, v.vertex); //Calculate the world position for our point
              o.normal = normalize(mul(float4(v.normal, 0.0), unity_WorldToObject).xyz); //Calculate the normal
              o.pos = mul(UNITY_MATRIX_MVP, v.vertex); //And the position
              o.uv = TRANSFORM_TEX(v.uv, _Tex);

              return o;
          }

          fixed4 frag(v2f i) : COLOR
          {
              float3 normalDirection = normalize(i.normal);
              float3 viewDirection = normalize(_WorldSpaceCameraPos - i.posWorld.xyz);

              float3 vert2LightSource = _WorldSpaceLightPos0.xyz - i.posWorld.xyz;
              float oneOverDistance = 1.0 / length(vert2LightSource);
              float attenuation = lerp(1.0, oneOverDistance, _WorldSpaceLightPos0.w); //Optimization for spot lights. This isn't needed if you're just getting started.
              float3 lightDirection = _WorldSpaceLightPos0.xyz - i.posWorld.xyz * _WorldSpaceLightPos0.w;

              float3 diffuseReflection = attenuation * _LightColor0.rgb * _Color.rgb * max(0.0, dot(normalDirection, lightDirection)); //Diffuse component
              float3 specularReflection;
              if (dot(i.normal, lightDirection) < 0.0) //Light on the wrong side - no specular
              {
                specularReflection = float3(0.0, 0.0, 0.0);
              }
              else
              {
                  //Specular component
                  specularReflection = attenuation * _LightColor0.rgb * _SpecColor.rgb * pow(max(0.0, dot(reflect(-lightDirection, normalDirection), viewDirection)), _Shininess);
              }

              float3 color = (diffuseReflection) * tex2D(_Tex, i.uv) + specularReflection; //No ambient component this time
              return float4(color, 1.0);
          }
      ENDCG
        }
    }
}
Conclusion
We’ve managed to make a basic shader using the Phong reflection model. It’s a really nice start and a good foundation for a lot of cool effects you can do with shaders. Until next time, keep hackin’.